Flute Project
Hi and welcome!
This post will be outlining the process of re-padding a flute as well as any necessary repairs made along the way. Working on flute is a very humbling experience and required a lot of patience.
Inspect and Disassemble


The venting is checked using a stepped flute gauge, each step represents the pads venting in millimeters.
Pad protrusion is checked using automotive feeler gauges and eye-loupes. I check each pad starting at 0.015" by holding the gauge up to the skirt of the pad cup. I adjust the gauge thickness as necessary until it aligns with the pad.


Since the flute is already disassembled, I begin to clean the hinge rods with denatured alcohol and crocus cloth. Instead of a bench motor, I use a mounted Dremel which achieves the same goal.
I 3D printed a mount and some c-clamps for this Dremel setup. I think its pretty neat.
This is what a completed inspection sheet looks like.
Cleaning
The flute is fully disassembled and ready for chemical cleaning. This includes the removal of any pads and cork.
The flute first gets dipped in phosphoric acid, also known as milk-stone remover, then rinsed and brushed thoroughly. From there, it goes into a silver dip to remove tarnish from the silver plate.
Finally, it is dried with compressed air and ready for the next step.
A silver polishing cloth is used for a final touch up and clean up tarnish buildup that the silver dip missed.
Tenon Fitting
It is important that the flutes head and foot joints fit snug in their sockets. My project flute had a lose head joint.
First, I apply so paraffin wax to an expander. This will help prevent any scratching or marring that can occur from the next procedure.
Because tenons are tapered, an expander can be used to widen the end of the tapered section. The expander is tightened - though not too tight to avoid flaring out the end - and pulled of the expander with a twisting motion.
Now the tenon fits very tight in it's socket. A method of burnishing the inside can be used to adjust the fit.
Paraffin wax is added to the tenon before putting it on to the flute body. Then, using a rapid twisting motion, I rotate the the head joint in its socket to create enough heat to melt the wax. This will also burnish the inside of the socket, making it wider. I do this until I get a snug fit that's not too tight.
Finally, I clean the tenon by removing the paraffin wax with a solvent, then dress it with crocus cloth to give it a satin finish.
Key Fitting
After the flute is cleaned and polished, the key fitting process can begin. This step is important for all woodwind instruments as it helps determine the accuracy of a pad closing over it's tone hole. The process is fairly transferable to most woodwinds, though some have some special cases.
The flute's hinge rods are all straightened and cleaned at this time. Then, all lateral and end play is removed. I go more into depth with this process in my Clarinet Repad Project. For this post, I will show some special cases that my flute had.
Post Alignment
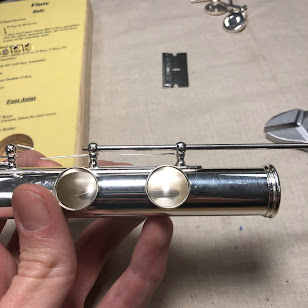
The low C key on my foot joint was having serious binding issues. This is fairly common and can be due to a few reasons.
1) The posts are out of alignment
2) The key arms are bent.
3) The hinge rod is bent.
All or a combination of the three can easily cause binding.
The quickest fix that can be done is straightening the hinge rod. This is done with a bench motor and hammer handle with a hole. The rod is inserted into the hole and pressure is applied as the bench motor spins it back to straight.
In the case of my project flute, all three of the alignment issues were present. I first insert the rod and see where it doesn't line up. Then, with the rod still inserted, I use two parallel pliers to bend the arms. I bend them so that the rod can freely slide in and out.
Next I align the posts with a canvas mallet. I insert the hinge rod in the posts to make minor adjustments. Some small taps are all it takes to get the rod moving freely again.
Flute C Key Adjustments
The C key on my flute was having a few issues. The hinge rod was
unable to fully fasten itself to the post and the key needed some
serious swedging. The threads have been damaged so that it does not fasten into it's post. This can be fixed by truing the threads with a die and tapping the post.
Using the bench motor as a guide, I use a die to fixed the damaged threads. This simple operation makes a big difference in the function of the hinge rod.
Extra Adjustments: Leveling Pad Cups and Tone Holes
This process is an important step before padding. Checking the pad cups for levelness will help alleviate any issue that may arise during the padding process.
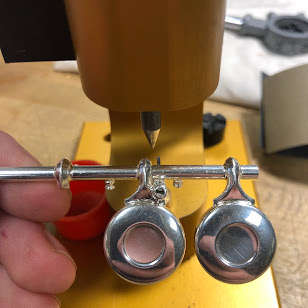
Using a bench anvil, I align the skirt of the pad cup with the machined flat side and check to see if the pad cup rocks in a particular direction. If the pad cup moves I know that it is likely bent to that side.
I make small adjustments with a canvas mallet by tapping the pad cup over the edge of the bench anvil. Only a few pad cups needed leveling, so next I check the tone holes.


The process for checking tone holes uses a leak light and a surface that is milled flat. In this case, I use a tool that is made specifically for checking flute tone holes.
First, the leak light is inserted into the body and the flat tool is positioned on top. There is a physical and visual cue that the tone hole is not level: the flat tool will rock on the surface and gaps of light will shine through.
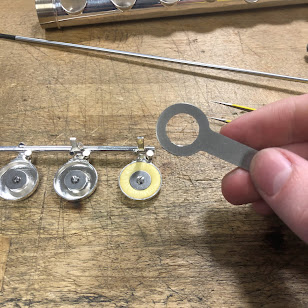
The tool on the right has varying sizes of pilots that fasten onto a circular disk of sandpaper. I use this tool to sand the tone holes flat. I make sure to do this procedure very carefully, tone hole rims have very little material to work with.
Padding
This post will briefly outline the padding process done on my flute project. There are quite a few steps involved, so I will do my best to keep it short and comprehensive.
Several
tools are used for the first steps of the process: tweezers for picking
up paper shims, 5 varying thicknesses of feeler gauges, felt
stabilizer, calipers, and a leak light.
Using calipers, I measure the pad cup depth and then the pad thickness. A good starting place for a pad's protrusion is 0.015". So with some math, I can determine the approximate shim thickness needed.
In this case, I determine that the D key will need a whole shim that is 0.002" thick. I record these numbers as I go in order to keep track of the total shim thickness.
I place the whole shim in the pad cup and the place the pad on top. The pad is secured with it's hardware.
Sometimes, the pad can become wrinkled when compressed by the screw and washer. This can easily be fixed with...
A metal pad iron and a few drops of water rid the pad of it's wrinkles.
I stabilize the pad with a plastic tool that shares the same shape as the pad ironing tool. The pads need this done each time they are reinstalled.
Then, using a 0.0005" feeler gauge, I check to see if the pad is hitting equally on the 12 and 6 o'clock positions. If the pad hits at 12 first, I know that there needs to be a reduction in paper shim thickness. Conversely, if the pad hits at 6 first, there needs to be an increase.
In
this instance, I find that the pad is hitting at 6 but not at 12. To
determine how much shim thickness to add, I use vary sizes of feeler
gauges at 6. I work my way up thickness of feeler gauge 0.001 ->
0.002 -> 0.003 -> etc until I feel the pad.
I felt the pad hit with the 0.001" feeler gauge, so I swap the 0.002' whole shim for a 0.003".
After
confirming the pad now hits equally in both quadrants. I lightly clamp
the key with a few drops of water, then using an air gun, heat the pad
cup. I let the clamped pad sit for about 15 min to seat.
Partial Shims
After the pads have been seated, they can be checked to see if partial shims are needed. I use the thinnest feeler gauge around the entire pad, if I feel an inconsistency in levelness I will mark the area with permanent marker.
Side Note
Flute Regulation
After padding is complete, the flute can be regulated to ensure proper pad closure. Many of the keys on flute are regulated to one another, meaning that depressing one key closes another.
Before any regulations can be adjusted, the F key's venting must be set to 4mm. This is done because all of the regulation sequences are directly affected by the F key. In short, it sets the basis of how the keys close together.
I apply thick felt to the F key foot that will set it's venting. Often, a thick variety of cork is used and then sanded until the key is vented properly.
The regulation sequence is carried out in a specific order. To keep it brief, the order is essentially a down-up approach, starting with the lower stack and then the upper.
What I look for when regulating is equal pad closure, using a feeler gauge and leak light as a guide. I make sure that the sequence is followed closely and do not move on until I feel that regulation point is fixed completely.
Regulation must be completed before addressing lost motion.
Key Corking and Lost Motion
After the cork is applied, the keys can be adjusted for lost motion and venting.
Foot
corks are sanded or adjusted with thicker cork to account for any lost
motion that was created during the regulation process.
Replacing The Head Joint Cork
Flute head joints are acoustically the most important part of the instrument. The head cork establishes the flutes fundamental pitch and tuning. My flute's current head joint was old and loose which calls for a replacement.
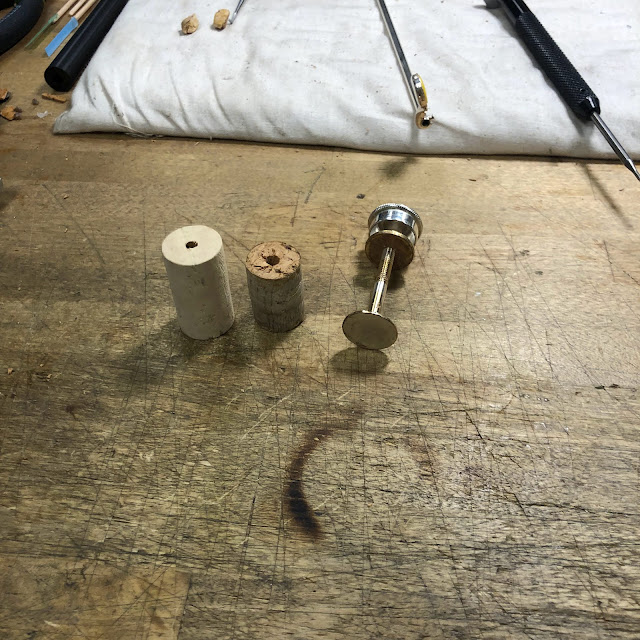
I trim the new cork to match the length of the old one. It will later be glued to the head joint plate.
The
lower plate had quite a few scratches and nicks. Using a lathe, I face
the plate to make it look like new. Although this does remove the silver
plating, it altogether is a cosmetic choice and wont effect how it
sounds.
The cork is glued to the lower plate with contact cement.
Then, I chuck the rod into the bench motor to sand a taper on the upper end of the cork. This will allow the cork to be pressure fitted. Using a leather strip and some parrafin wax, I power the bench motor and seal the cork.

I insert the cork until it just shows at the lip plate opening.
A self-made flute push rod is used to insert the cork. The silver scribe mark should line up with the center of the lip plate. This will measure 7mm from the plate to the center of the opening which sets the correct pitch.
Final Adjustments
To prevent the hinge rods from corroding I add a small drop of motor oil to each mechanism. This also helps them move smoothly.
Then, I check one last time with the Magnehelic machine to make sure the flute is sealing.
The flute is wiped down with a polishing and microfiber cloth. But before it can be placed in its case...
The case's insert was broken and needed to be fixed. I use some hot glue for the insert and vacuum out the case.
That concludes the flute project!








.HEIC)



Comments
Post a Comment