Clarinet Repad Project
This is the first instrument project I will be completing for class. It involves completely tearing down a student clarinet and restoring it to perfect playing ability. The clarinets were donated to the program through an organization named Vega. Once this clarinet is complete, it will go back out into the world for the new student to play!
The following will entail my full journey on my first ever clarinet repad/overhaul. I had a lot of fun and look forward to doing this more often.
Inspect and Disassemble.
This is the clarinet I will be overhauling. It is a Bundy Resonite and has a lot of work ahead of it.
The first step of this entire process is to inspect and record any notable info about the clarinet. An inspection sheet is necessary to organize findings and important information.
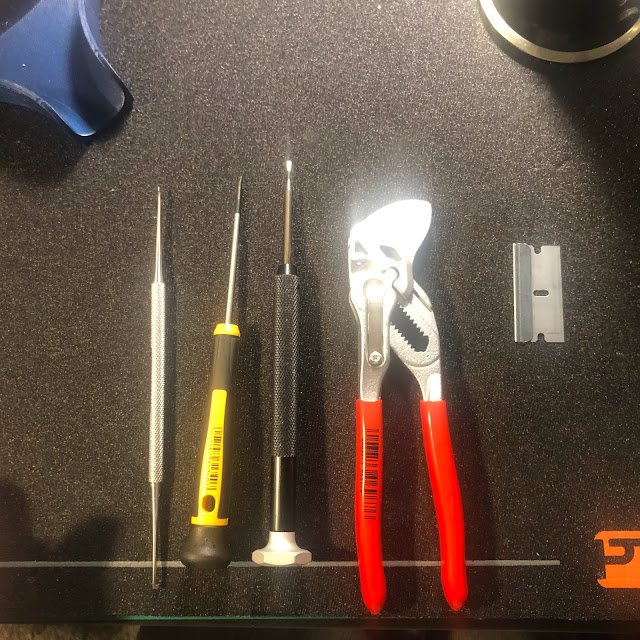
To begin, I start to disassemble the clarinet using screwdrivers, parallel pliers, and a spring hook.
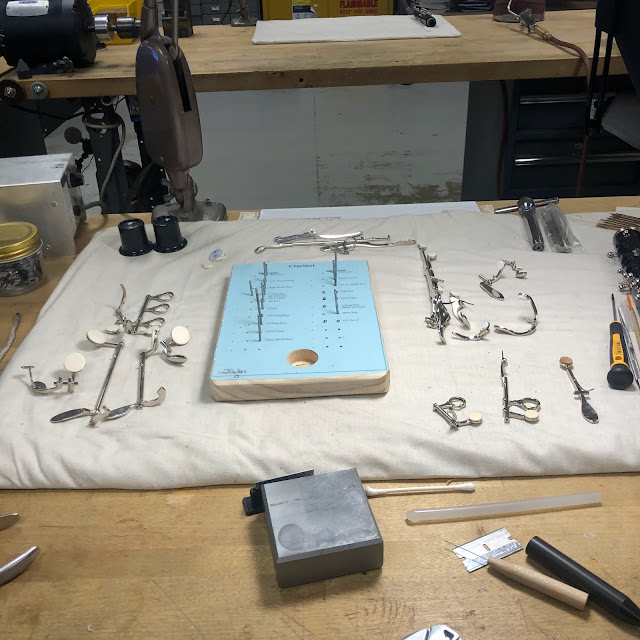
Each key is held between posts with either a hinge rod, pilot pivot screw, or a combination of the two. Using a clarinet screw board, I organize the hardware to their respective keys. Organization is key as mixing hinge rods/screws can seriously complicate reassembly.
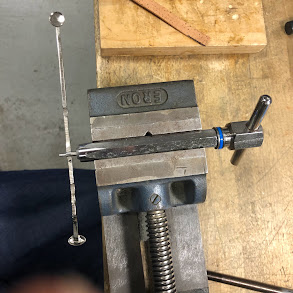
Shown above is a standard hinge rod and next to it a pilot point pivot screw. These types of pivot screws are most common in student-line instruments and known to be difficult to adjust.
Now that the clarinet is fully taken apart, I begin to fill out the inspection sheet.
During this process, I look at each key and take into account the pad protrusion and silencer specifications. Then, while reassembling the clarinet, I record venting using pad slicks and check for other general information such as key fitting, regulation, pad leveling, and lost motion.
Finally, I check for any cracks on the instrument, the conditions of the upper and lower joints, and the ring tightness on the barrel and bell.
With that, I am ready to move on to cleaning!
Cleaning the Keys and Body.
Now that the inspection sheet is complete, I once again disassemble the clarinet and prepare for cleaning.
Before it can be cleaned, the keys are stripped of their pads and cork silencers. I use an acetylene torch to heat the pad cups to remove the pads and clean out any old glue. Then, using a solder scraper, I remove the cork silencers and any leftover contact cement.
For the upper and lower joints, I remove the tenon corks with a screw driver and solder scraper.
There is visible gunk and debris built up on the body. The keys are not quite as dirty but definitely need some treatment.
In the chemical room, I place the keys and clarinet body in a de-greasing solution. This is safe for a plastic clarinet body and keys and will remove any old cork grease or other build up.
I rinse off the bodies and set the aside for now. It is important to mention that this process is only done with plastic clarinet bodies. If the clarinet were wooden, it would go into a wood cleaning solution for a short amount of time.
Next, with the body set aside, the keys are rinsed and pickled in acid. This acid is safe for non-ferrous metals like nickel plated keys. The acid will remove any build-up present on the keys.
The keys are thoroughly rinsed and dried off with compressed air along with the body.
Checking For Cracks
Before moving to key fitting, I check to make sure that the body is capable of sealing. This machine will ensure that there are no cracks in the body of the instrument by measuring internal pressure.
A tube is connected to one end of the body and the remaining holes are plugged.
The Magnehelic machine is switched on and the dial indicates "0" meaning that there are no cracks or leaks. This process is done to both joints.
Key Fitting
In reference to my inspection sheet, I begin the key fitting process.
Key fitting refers to how well a key fits between its posts. Any amount of end play (side to side) or lateral play affects how the respective pad fits over a tone hole. In short, a key must be fitted securely and accurately to ensure that the instrument plays.
This can be done a number of ways. In this case, the C and Bb trill keys need to be swedged so that the hinge rods fit with a tighter tolerance.
These
keys are interesting since they share one hinge rod, the Bb trill key
fits over the hinge tube of the C trill key. In order to swedge the Bb
trill key I need a precision fit mandrel to fill the tube.
(The key
on the left is the C trill with its original hinge rod inserted; the key
on the right is the Bb trill with a mandrel inserted.)
This tool held in the vise is known as a collet swedging tool. It uses a collet to close around a hollow hinge tube to create a tighter tolerance around the hinge rod.
Swedging pliers are another tool that work in a similar manner, but require a different technique.
I insert the C trill key into the collet in the orientation above. It is extremely important that the hinge rod or a mandrel is inserted into the hinge tube, otherwise it could completely collapse and be rendered useless.
Swedging requires a cautious feel of how hard the key is being swedged. I rotate the collet swedging knob until I feel some resistance. Then, depending on how much needs to be swedged, I rotate the knob about 5-15 min on the clock. After swedging the key in the pictured orientation, I rotate it 45 degrees and repeat. The key is swedged and rotated until it returns to its original position - this ensures that the tube is equally swedged on all sides.
If the hinge rod does not slide smoothly into the hinge tube, it may have been swedged too far. This can be fixed using a hinge tube burnishing rod to open up the tube very slightly.
During the key fitting process, time is spent installing the key and testing the kit between each procedure. Doing so helps confirm progress made on swedging and discovering if the tube has been swedged too far.
After confirming that the C trill has been swedged and fits correctly, I move on to addressing the fit between the two keys and posts.
I swedge the Bb trill key and get a good fit between the posts. However, this has an adverse effect on the fit between the two hinge hinge tubes - they no longer move freely when in contact.
This issue is fixed using lapping compound - a liquidized grit. I apply a small amount to the inner tube and then work the two keys in tandem. This process requires patience and careful monitoring of the fit. Lapping for too long can permanently expand the diameter of the tube.
After a few minutes, the mechanism is no loner seized and can be fit appropriately to the posts. Onto the next key!
Re-threading a hinge rod and post.
When working on the Alt. F# key I encountered an issue with the hinge rod's threads. It seemed that the threads were stripped and could not be inserted fully. Using a tap and die I prepare to make new threading.
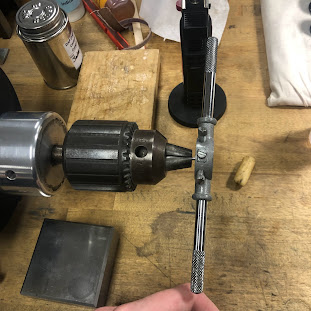
First I chuck the hinge rod into a bench motor. Then using some lubricant wax, I die the threading by hand spinning the motor. Then, I tap the post by hand. I clean then test the threading.
With that, the hinge rod can be fully threaded into the post, securing the Alt. F# key in place.
Creating a new key spring.
The
next issue I encountered was the A key spring. Flat springs are
commonly used for the A key, however on this instrument, a round spring
is installed. This round spring has lost its strength and is not strong
enough to keep the A key sprung close. This means that a new spring will need to be installed.
I use parallel and duckbill pliers to remove the old spring.
The left image is the original spring next to round spring stock. Using diagonal cutters, I cut the stock spring to length.
Round springs are held in place by a dove-tail on one end of the spring. The dove-tail will allow the the spring to be wedged into the post.
To create the dove tail, the round spring is heated up with a torch (until red hot), and quickly set on the edge of a bench anvil. Then, while the spring is still hot and malleable, it is hit with a steel hammer.
Here is a close up the spring, notice the dove-tail that is formed on the right side.
Before installing the spring, the clipped side needs to be rounded to a dull point. A Craytex wheel can be used to achieve this.
I install the spring using round nose pliers. The spring is inserted into the post, then the pliers can be used to grip the top side of the post and the dove-tail end of the spring. A gentle squeeze and rocking motion pushes the spting forward.
Finally all that is left is to bend the spring so that it has enough tension to hold the key closed.
Fixing a damaged hinge tube.
The F# ring key was experiencing some issues binding. The hinge rod seemed to be straight so the key's hinge tube is likely bent.
I tried a few different ways of fixing the key, hitting the binding area with a canvas mallet and delrin wedge, and bending the key with pliers so that the rod would spin freely. However none of those methods seemed to solve the issue.
As a last resort, I use a reamer to remove a small amount of material from the inside of the hinge tube.
Finally, I use some lapping compound on the hinge rod and tube which thankfully resolves the issue.
Buffing and Polishing
Once cleaning, body repair, and key fitting have been completed the keys go on to buffing.
Green buffing compound is great at giving nickel plated keys a good shine.
Tenon Corking
Tenon corking is up next. During the cleaning process the old tenon cork is scraped off.
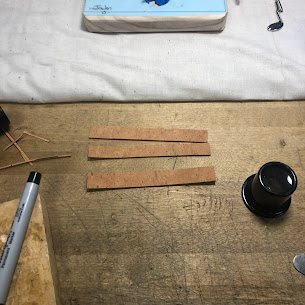
Using sheet cork, I will measuring, cutting, gluing, sanding, then sealing the cork. This process must be done to a degree carefulness; if one step goes wrong then you essentially have to start over again.
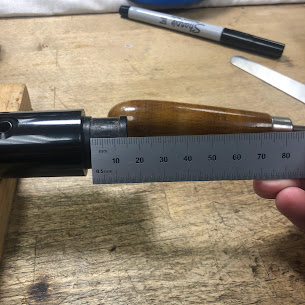
Here I measure the tenon's recess with a ruler and eye-loupe. Then, I write down the measurements for cork cutting.
I
measure from the edge of the cork ,using my previous recorded
measurements, and mark with sharpie. Each tenon cork is cut accordingly
with a razor blade and ruler acting as a straight edge.
Next, each tenon cork is beveled on one end and compressed in a bench vise. Compressing the cork helps make it less rigid and easier to bend around a radius.
Each tenon is then test fitted and marked at where the bevel overlaps. This mark will help show where contact cement needs to be applied.

 Contact
cement is applied to the corks and clarinet's tenons and set aside to
dry. It is import that contact cement has cured before joining the two
parts - this ensures a strong bond.
Contact
cement is applied to the corks and clarinet's tenons and set aside to
dry. It is import that contact cement has cured before joining the two
parts - this ensures a strong bond.The cork is wrapped around the tenon and then trimmed at the bevel.
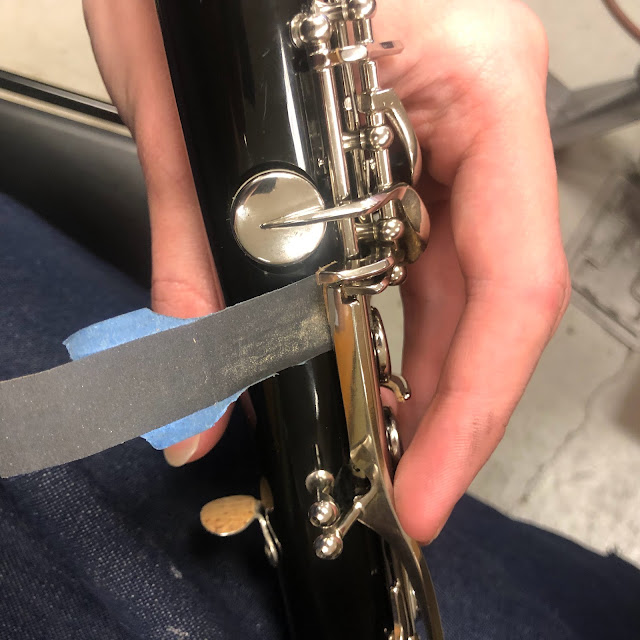
Using 320 grit sand paper, the radius of the tenon is sanded so that it can fit into its respective socket. This process takes awhile, a lot of time is spent sanding and test fitting. Once the tenon fits about half way into the socket, it is ready to be sealed.
Paraffin wax is great at sealing cork. Using a blazer torch, the wax is softened and rubbed into the tenon cork. Then, very carefully, the blazer torch is used to melt the wax into the cork. If the flame is not controlled and kept far enough away, the cork will burn. 2 coats of paraffin will be applied to each tenon.
Finally, a small amount of cork grease is applied. From here the tenons will fit to their sockets for about 20 minutes or so.
Installing Pads
The keys are going to be outfitted with some new pads:
Bottom joint keys all get bladder pads (left).
Top joint gets all synthetic pads for keys that are sprung close, the ring keys get bladder pads (right).
The register key has a cork pad installed. Cork is used for the register key due to its water resistance - the register collects a lot of moisture.
The process for installing a cork pad is slightly different than that of synthetic/bladder pads.
The cork pad is beveled on one side and sanded flat on the other. Then, the beveled side of the cork is glued into the key cup. The leveling process is done the same as the others.
I start with the A and Ab throat keys after leveling the register key.
Since they are sprung closed, they will be using synthetic pads.
(This project specifically required synthetic pads on sprung closed keys, bladder pads are just as effective.)
Padding keys can be achieved using multitude of techniques and tools. For smaller keys, I decided to use an electric pad cup heater.
First, I slice off a piece of hot glue and place it inside the pad cup. Then, using the pad cup heater, I heat up the key until the glue goes from opaque to transparent. The pad is then set into the pad cup and given a slight twist - this will help distribute the glue. Finally, while the glue is still hot, I place a pad slick flat against the top of the pad and make it parallel to the pad cup skirt.
After padding the A and Ab, this is what they look like. Next they will need to be leveled while on the clarinet.
Using a feeler gauge, I check around the A throat key for equal pressure around the tone hole. This step is paramount for ensuring a pad is sealing properly. Developing a good feeler gauge technique is important too.
When check for pad levelness, the top of the pad cup is often visualized as a clock; the key arm represents 12 o'clock. In the pictures above, I indicate where the pad is failing to seal: at 6 and 9 o'clock.
The pad is then heated. It is important to note that the pad cup was not heated during the capture of this photo. When heating a sprung close key such as this, it is good practice to open the key and then heat the pad cup.
The pad cup is heated for about 6 seconds and then leveled with a pad slick. Since I know the pad is not sealing at 6 and 9, I would orient the pad so that less of it protrudes at 12 and 3.
After leveling, I confirm with a feeler gauge and adjust as necessary.
Next I do the whole process for the Ab throat key and the rest of the upper joint.
This skill takes experience to get fast and consistent at; I look forward to improving my own padding speed.
For the sake of brevity, I will not go into great detail on how the lower joint is padded. It is not much different than padding the upper joint, the only difference is that the pad sizes increase.
For larger pads, I use an acetylene torch instead of a pad cup heater. Not only does a torch heat faster, it is also good to learn multiple ways to heat pads.
With padding complete, I can move on to applying cork to the keys.
Key Corking
Once the keys are padded, cork can be applied to the touch-pieces and key-foots.
Applying cork is important for numerous reasons:
1. Sets the venting of the key.
2. Silences key action and articulation points.
3. Can adjust for lost motion.
First, I organize the keys by the thickness of cork needed.
After the cork is glued, it is trimmed and beveled with a razor blade.
This process is repeated for the remaining keys. Often, natural cork is used because it is easily adjustable via sanding is generally easier to work with. In some cases, for instance with the F/C Key's crow's foot, "tech cork" is used - a synthetic version of cork that is more rubbery. For articulation points that need extremely thin material, Teflon sheets may be utilized as well.
Regulation, Venting, and Lost Motion
Now that the keys have cork, adjustments can be made to account for pad closure and key mechanisms.
The
first adjustment is made at regulation points. A regulation is when two
or more keys are actuated by a single key press. Their are 2
regulations on clarinet:
The A/D Ring Key to 3 Ring Key (Bb/F Bis Key).
Low F/C to low E/B keys.
The ring key regulations are adjusted at the bridge. This can be done by flexing the upper bridge up or down. Then, a feeler gauge is used to determine if the pads are closing together.
For the F/C - E/B regulation, adjustments are made by flexing the F/C touch piece up or down. Again their closure is checked with a feeler gauge.
After regulation, lost motion and venting can be adjusted. This is done by sanding the foot corks of the keys.
Venting is refers to how much space there is between the pad and tone hole when actuated. Venting is determined by using a pad slick as a gauge. For a majority of sprung-closed keys, it is the width of a single pad slick between the pad and body.
Lost motion is important for sprung-close keys that work in conjunction with other keys. It ensures that a opening rotary key stays in contact with the tone hole until pressed.
The clarinet has 4 lost motion areas.
Throat A key arm and Throat Ab adjustment screw
Throat Ab key foot cork (when Throat A is depressed)
F/C Lever and F/C Key
F#/C# Lever and F#/C# Key
Testing
Once again, I check to see if the clarinet is sealing on the Mag-Machine. This is important to do after making changes to regulations and lost motion.
Finally, I play test the clarinet, paying close attention to any difficulties that may occur. Often if a note is out of tune or difficult to play, there is an issue with venting or regulation. Further adjustments can be to fix these issues.
While I am playing, I am closing the pads with least pressure possible. If the pads are level, they should seal with little effort.
After final adjustments and a quick microfiber cloth wipe down, the clarinet is done!
Thanks for reading!















Comments
Post a Comment