Clarinet Tone Hole Repair
Today I will be going over a few different ways to repair tone holes and chimneys on a clarinet! Tone hole replacement/repair is an important skill to learn. Damaged tone holes, usually due to a crack or it getting chipped, can prevent pads from sealing and thus prevent the instrument from working properly.
This was a fun side project to work on. It really helped test my skills in making accurate parts on a lathe and alignment for milling processes.
Tone Hole Sleeve


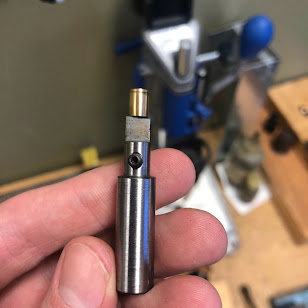
Using a drill press, I use a flat end mill is used to drill down into the inner diameter of the tone hole.
A pilot is used to help center the bit over the tone hole. It is imperative that the new hole being milled is centered perfectly. The flat end mill is slightly larger the the tone hole's diameter.
A jig is used to support the clarinet from both ends. Its ends tightened
and the base is held to the drill press table with c-clamps. Getting the jig and the
milling bit aligned can be a tedious process but must be done right to
yield good results.
With everything aligned, I drill into the clarinet about 1/2 - 3/4 of the way towards the bore (I use wooden wedges to support the underside of the clarinet though it is not pictured).


Next I prepare the delrin stock. The stock has already been turned to the diameter needed for the milled hole. I insert the the small side into the tone hole and mark where to cut. Using a jewelers saw, I cut off the part I need.
Then, using a lathe, I face the end to get a smooth and flat surface.
Referring to my measurements, I choose a drill bit that matches the inner diameter of the original tone hole and drill into the stock.
After, I use a parting bit and cut off the drilled section.
Here I test fit the machined sleeve. I am looking for a fit with little to no wobble. There does need to be a small margin of space available for gluing later on. In addition, it must be protruding from the tone hole enough to be milled down. It is better for it to be too tall rather than too short.


I use a small amount of two-part epoxy to adhere the sleeve to the tone hole. If there is not enough epoxy holding the sleeve in place, it is guaranteed to come loose either during the next step or when the clarinet expands due to climate. Any excess epoxy can easily be cleaned up later on.
To achieve the sloped-shape of a tone hole, I use an angled milling bit. I jig the clarinet up the same as before, this time you can see the use of the wooden wedges to support the underside.
Here are the results. Compared to other methods, this one creates a more discreet appearance.
Tone Hole Insert
This repair is more common because cracks often affect a large portion of the tone hole than just the edge.

.HEIC)
Using a plug gauge, I align the clarinet in it's jig to the drill press. Then, I use the flat end milling bit. The bit is slightly larger than the tone hole's opening.
Also known as a raised tone hole, chimneys are found directly underneath the ring keys and are sealed by a player's finger tips. Repairing a chimney requires the complete replacement of the tone hole and its shape.
Before making any irreversible changes to the current chimney, I take every possible measurement are write it down. I even made a diagram for myself so I could understand which measurement goes where.
These measurements are very important as they will serve as blueprints for creating an entirely new chimney.


After aligning the clarinet, I mill out the old chimney completely. All that is left is a thin shelf that the new chimney will sit on.


These next few steps will require the use of a larger lathe. I start by facing, then I turn the outer diameter down to match the chimney's lower brim.
In the background, there is a dial indicator. I used this tool to gauge how far down the delrin I was turning.
While going back to do some clean-up passes of the chimney, I made the mistake of turn the cross slide wheel in the wrong direction. Because of this mistake, I did have to readjust the depth of the chimney's stem. But this mistake is not detrimental as it will later be milled down anyways.


I use a parting bit to cut off the amount needed. This required some careful measurements, as the brim needed to be as specific thickness.
Then, I rough up the bottom of the chimney insert to help with adhesion when epoxy is applied.
Once the epoxy has cured, I set up the clarinet at the drill press. I made sure to use plenty of epoxy, which means some happened to seep out in the interior. I cleaned up the excess with a drill bit.
I use a flat end milling bit until it is the same height as the neighboring chimney. I also reference my previous measurements.
Finally, I do a cleanup of the edges using an inside and outside sanding tool.
The finished results! Thanks for reading.


.HEIC)


Comments
Post a Comment