Making a Large Poking Tool
Tools and materials.
This project requires a handful of tools with the use a bench motor.
The goal is to embed a large needle spring into a 3" Delrin rod to create a poking tool.
Removal of the machining marks and facing.
 |
| Delrin rod chucked into a bench motor. |
The first step is to remove the machining marks and create a flat face. This is done by chucking the rod into the bench motor and filing it down.
 |
| Result of filing. |
The image above shows how the file creates a concentric finish. This will be done to both ends.
One important aspect of facing is to de-flash the edges to eliminate any burs.
 |
| Checking leveling on a bench anvil. |
After each filing, I confirm that the face is level with a bench anvil.
Filing a tapered end.
 |
| Marking the measurement. |
The next step is to taper one end of the rod; 1/2" length to 1/4" diameter.
 |
| After filing a taper. |
Using the file at about a 30 degree angle, I manage to get a decent taper that meets the measurements.
 | |||
| Facing and taper complete. |
Punching a hole for drilling.
.HEIC)
With the assistance of the bench motor, I spin the rod with a pencil directed at the newly tapered end. I hold the pencil lightly so that it naturally finds the center of the stock. With this marked, I punch a small pilot hole.
 |
| Drill bit in bench motor chuck. |
After chucking the drill bit into the bench motor, I carefully align the rod so that it is centered. Then, I power the motor and begin to drill a hole (1 5/8"). This is where the needle spring will be embedded.
 | ||
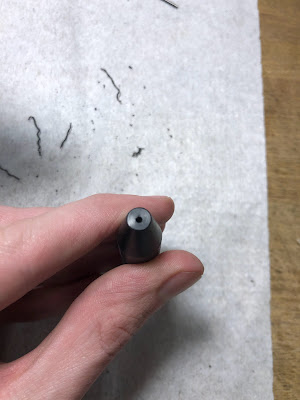
| Drilled hole. |
The rod is now complete and ready for the needle spring. However, there is one adjustment that is made to the spring before continuing.
Preparing and embedding the spring.

Carbide wheel and needle spring.

To embed the needle spring, the blunt end needs to be ground to a point via silicon carbide wheel.
This requires the needle to be held at a 45 degree angle parallel to the wheel, spinning the needle spring simultaneously in hand to create the point.
 |
| Result of grinding. |
This point will help secure the spring in the rod.
 | ||
| Spring chucked into bench motor. |
The spring is secured into the bench motor to begin the final step. 1 1/2" of the needle spring will now be embedded into the rod.
 |
| Preparing to embed the needle spring. |
To embed the needle spring, the rod is held centered and slowly pushed onto the spring.
Done!
Overall this was a great introductory project and really shows how much there is to learn with the bench motor and file.
On to the next project!
Tools used: Bench motor, bastard file, spring-loaded center punch, drill bit, bench anvil, ruler, eye-loupe, pencil


Comments
Post a Comment